
At first glance, digital escape rooms (also called digital breakouts or digital breakouts) look daunting to create. Hopefully, this post will show you that in just a few steps, you can create your own digital escape room!
We have created a planning template for you to use to make a digital escape room!
Click here to make a copy of this FREE digital escape room planning template.
Now you’re ready to get started.
Check out these step by step instructions to make your own digital escape room!

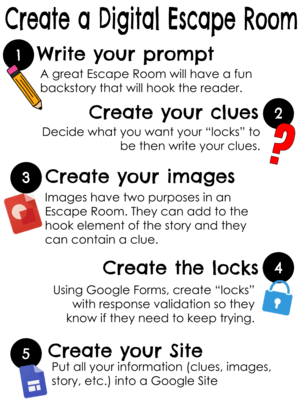
1. Write your prompt
You need a good story to hook the audience. When you go to a physical escape room, they set up the situation with a story or information at the beginning. The purpose of this Halloween themed digital escape room was to share some tech ideas with my staff in a fun way.
So I wrote an introduction to tell my audience what was happening:
“Double, double, toil and trouble. I’ve dropped the keys to my broom in the bubbles. If I don’t find them, the keys will dissolve, but you can help me with riddles to solve. Click around, don’t be scared. I won’t turn you into a frog, but maybe a bear.”
2. Create your clues
Determine how many and what kind (number, word, etc.) of clues you want. Since I created a technology breakout, I knew my clues should lead people to (hopefully) new technology ideas. So I started brainstorming.
During this step, I also created all of my clues. Some are in Google Slides, Docs, Jigsaw Planet, etc. I keep all of these in a folder in my Google Drive so everything is together.
Here are the clues I used for my Halloween themed digital escape room:
- To introduce Wakelet – a link will take teachers to my public Wakelet profile so they can see the boards I have created and share. CLUE: WAKELET
- To show Google Translate in a Doc – a link will take teachers to a doc in another language but with an animation that shows them how to translate the doc. The translation will give them the clue. CLUE: SWEET
- To introduce genia.ly – a link will take teachers to a created Genial.ly presentation. The clue will be included in the presentation. CLUE: 1031
- To show a fun Google Search Atari Breakout – Create a puzzle at jigsawplanet.com and when put together, it has instructions on how to search Atari Breakout. CLUE: ATARI
- To introduce “hidden word” in slides: a link will go to a slide where you move the magnifying glass to see the clue. It will also go to a blog post on how to create your own. CLUE: MAG10
- Distraction/fake clue – one link will go to a fake iPhone message talking about Slidesmania
- Distraction/fake clue – one link will go to an animated gif of a bubbling cauldron
Here is a Wakelet collection with even more clue making resources.
3. Create your image(s)
I almost always have an interactive image that I create in Google Drawing. We plan to put all of this in a Google Site at the end, and you can easily import a Google Drawing and keep the “hotspots” active this way.
Open a new Google Drawing and start creating your scene. It can be as easy as a single image (the reindeer in this Reindeer Games digital escape room), or as fancy as a full scene (like the image below).

Once your image is created, you need to link your clues to each object. I have 5 clues, so I linked it to the window, broom, cat, book, cauldron, and one of the flasks.
You can make anything you added to your image clickable as a link! To do that: First, click on the object you want to link (in the example, I clicked on the window), then click on the link button and paste the link to the clue. Continue this process until you link to all of your clues.
Some breakouts may have more than one image. In my trianglesonly.com breakout game, I had multiple pages on the side, so I repeated the process for each image I created.
4. Create your locks
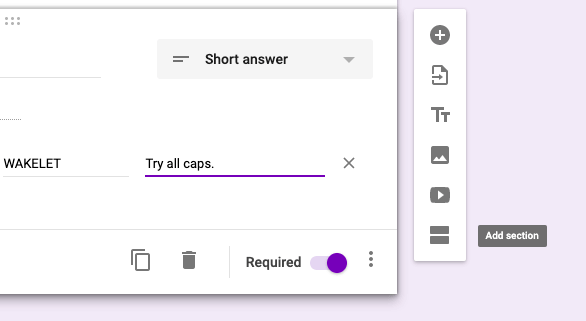
This step uses Google Forms. Create a new Google Form (I keep everything for each escape room in one folder). You want to use response validation (check out this video for a walkthrough on how to add it) so they have to type in the correct clue. You also want to make the question required.

For number locks, I use the number is equal to setting then type in the number you want. You can also type in a custom response if they get it wrong. For a number, I usually just use “try again”.

For letter locks, you will select text contains. Forms are case sensitive so my clue usually directs them to capital or lowercase letters.
Continue this process until you have all of your clues entered.
I like to include a special message or image once the person “escapes”. To do this, create a new section in your Google Form.

On this new page, you can post a message or an image congratulating them on escaping.

5. Create your Google site
In my opinion, this is the most exciting part of the process. This is when everything you have created comes together as an escape room.
Go to sites.google.com and click the plus sign in the bottom right corner.


You will get this page to start with. Title your site so you can come back to it later. You can change your theme, colors, and fonts on the right side. Play with it until you have exactly what you want.

I inserted a text box and added the introduction that I wrote earlier.
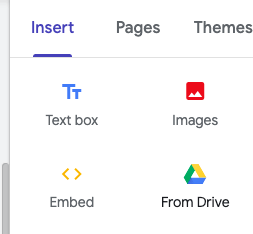
Next, I inserted the Google Drawing using the insert from Drive button.
You can use the corners and drag your image to be as large as you want. I do the same for the Google Form. Sometimes I position them side-by-side, other times I position them with the Form below the image. Use whatever works for you and the image(s) you have created.

When you are ready, hit the publish button. Don’t forget to go through the Escape Room yourself and make sure everything works as you want. You can click the link button at the top right on the toolbar and get a code that you can share. When I create these for students, I post that link in Google Classroom.
That’s it! Now you’re ready to get started creating your very own digital escape room.
How to create a digital escape room for your class or PD is written by Mandi Tolen a math teacher from Missouri. You can connect with her on Twitter @MandiTolenEDU and check out her blog infinitelyteaching.com